 |
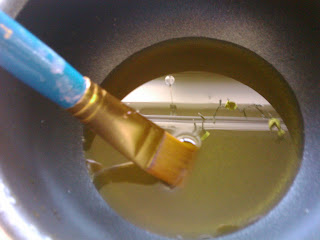
| I used almond oil because it's what I had. I wouldn't suggest mineral oil because it's petroleum based. |
 |
| Iron your cloth so that its nice and smooth. Then cut your cloth to size. Pinking shears may be helpful and add a nice edge around your cloth. |
 |
| Put your cloth on top of the parchment to protect the surface your working on. Start painting on the wax. |
 |
| You will get some pooling of the wax but no worries, we'll eliminate that in the next step. |
 |
| Put the waxed cloth in between 2 pieces of parchment. Make sure you have room all the way around the cloth for the excess wax to leak out. |
 |
| Cover the waxed cloth with the top sheet of parchment and iron on a med-high setting. |
 |
| You can see how the wax melts and moves to the edges as you iron. |
 |
| I like to use the edge of my iron to press out the extra wax. |
 |
| You may still see a slight layer of wax on top of the fabric. You can use a paper towel to blot this off while the wax is still hot. Let the fabric dry and then they are ready to use! |


This is brilliant! I have to go and try it now. Thank you for sharing on KCCO!
ReplyDeleteThanks! I'd love to hear how yours turn out!
DeleteGreat idea- I'm gonna try this too.
ReplyDeleteLet me know how yours turn out!!!
Deletethis is so handy and smart! thank you for posting! but what do you use the oil for?
ReplyDeleteOops! Looks like I forgot to add that part. I add a few drops of oil to the melted beeswax to thin it out a little bit. But only a very small amount will do. To much and you'll have a skin cream :) Thanks for letting me know about that! Have a beautiful day.
DeleteThank you for sharing this great idea. Will definitely be trying it. Does it keep bread fresh?
ReplyDeleteI'm always looking for ideas like this thanks for sharing it on Sharing Creative Ideas!
ReplyDeleteHave a wonderful weekend,
~ joey ~
Wonderful tutorial! I am going to make some to go along with our picnic supplies :) Thanks for sharing at Creative Learning
ReplyDelete